Paper: Connected HTML/CSS Canvas for Teams
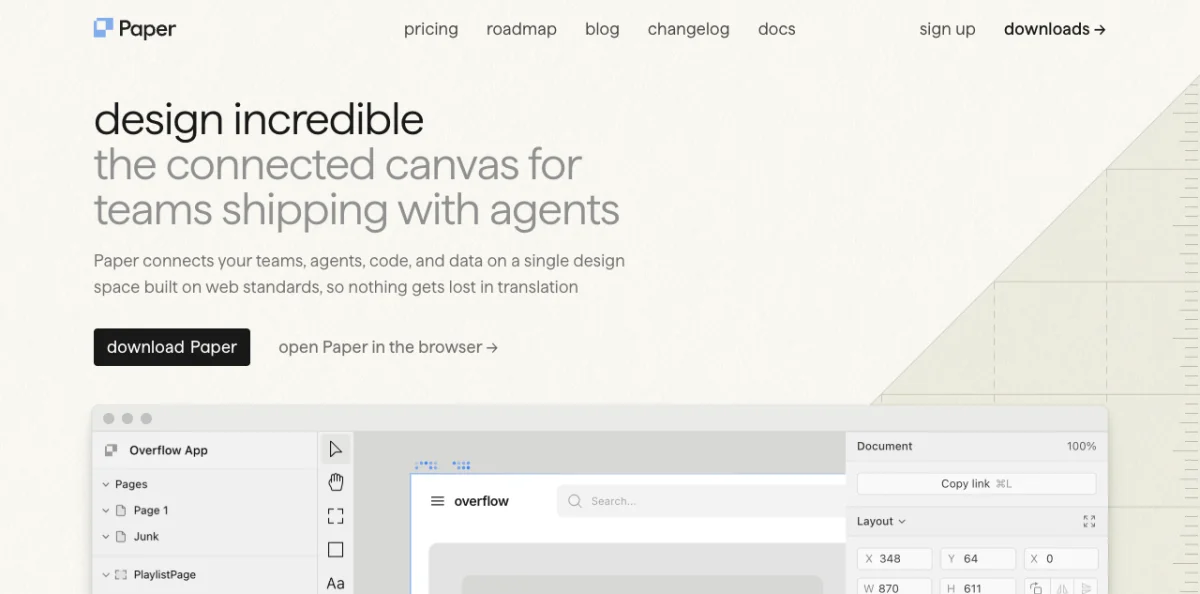
Paper (paper.design) is a connected HTML/CSS canvas for teams shipping with AI agents. Built by the Paper team, it exposes a rich MCP server that lets agents read designs, export JSX, and write HTML back to the canvas. The key differentiator: design-to-code and code-to-design in the same loop.
As of May 2026, designers at Vercel, Perplexity, Lovable, PostHog, Tailwind, Dub, Replicate, Zed, and Attio use Paper in production. The product lineup includes Paper Web (app.paper.design), Paper Desktop, Paper MCP, Paper Snapshot, and Paper Shaders.
Paper's design surface is HTML/CSS. The design artifact is HTML. The export is HTML. There is no translation layer between what you see on canvas and what ships in production. This makes Paper particularly effective for agent-driven workflows: an agent reads the HTML, modifies it, and writes it back. The canvas updates. No round-trip through a proprietary format.
Paper Desktop unlocks the MCP workflow. It connects to Cursor, Claude Code, Codex, Copilot, OpenCode, Zed, iTerm, VS Code, GitHub, Windsurf, Notion, Cline, and Continue. When you open Paper Desktop and load a file, the MCP server starts automatically at http://127.0.0.1:29979/mcp.
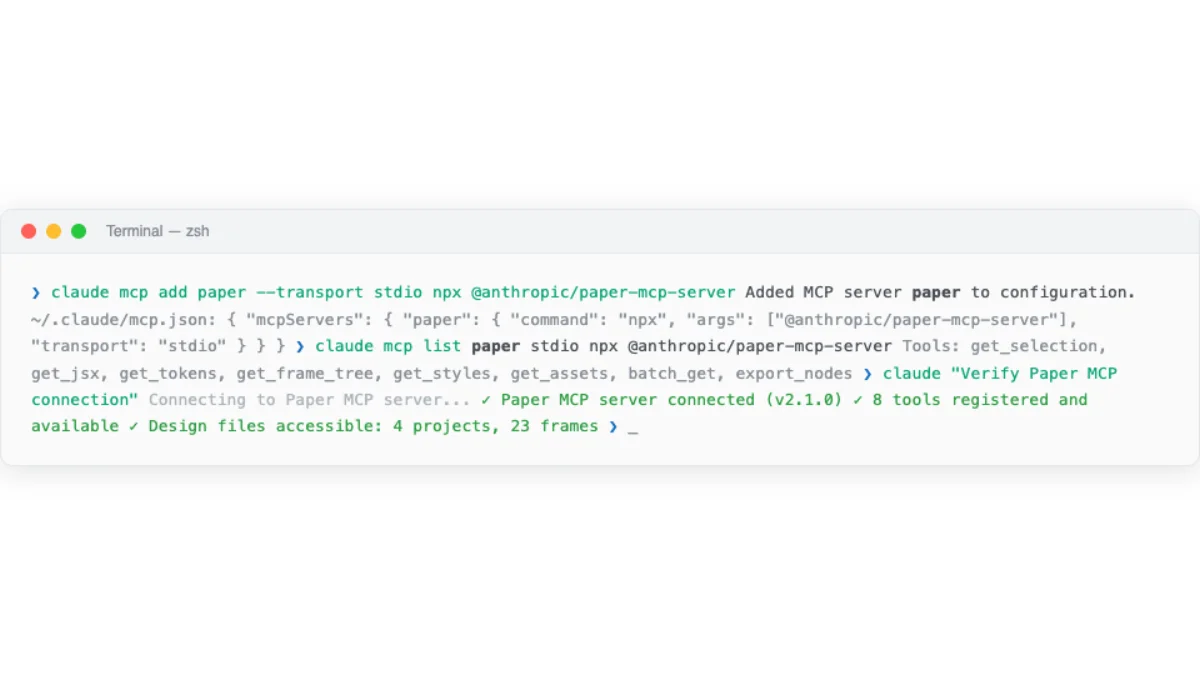
The architecture is straightforward. Paper Desktop runs a local HTTP server that implements the MCP protocol. Agents connect to this server and call tools like get_screenshot, get_jsx, write_html, and export. The server communicates with Paper's canvas in real time. Changes appear on canvas within seconds of an agent writing them.
Setting Up the Paper MCP Server
The Paper MCP server runs locally at http://127.0.0.1:29979/mcp. It starts automatically when Paper Desktop is open and a file is loaded. The setup differs by agent platform.
Claude Code has two methods. The manual approach:
$ claude mcp add paper --transport http http://127.0.0.1:29979/mcp --scope userThe plugin approach (recommended for Claude Code users):
$ /plugin marketplace add paper-design/agent-plugins
$ /plugin install paper-desktop@paper
OpenCode uses the opencode.json config file:
{
  "mcp": {
    "paper": {
      "type": "remote",
      "url": "http://127.0.0.1:29979/mcp",
      "enabled": true
    }
  }
}
Copilot (VS Code) needs a .vscode/mcp.json in the project root:
{
  "servers": {
    "paper": {
      "type": "http",
      "url": "http://127.0.0.1:29979/mcp"
    }
  }
}
Codex CLI uses Settings > MCP Servers > "Streamable HTTP" tab. Enter the name "paper" and the URL.
Claude Desktop requires the mcp-remote package:
{
  "mcpServers": {
    "paper": {
      "command": "npx",
      "args": ["mcp-remote", "http://127.0.0.1:29979/mcp"]
    }
  }
}
Cursor uses a plugin command:
$ /add-plugin paper-desktopAfter setup, verify the connection by asking your agent to create a simple element. Something like: "Create a red rectangle in Paper." If the rectangle appears on canvas, the MCP server is working.
If the rectangle doesn't appear, check the troubleshooting table:
| Symptom | Cause | Fix |
|---|---|---|
| Agent says "Paper tools not found" | MCP server not connected | Verify Paper Desktop is open with a file loaded. Check MCP config path. |
| Agent stops responding to Paper tools mid-session | Long-running session lost connection | Restart the agent session. Paper's MCP connection can drop after extended idle periods. |
Connection refused on 127.0.0.1:29979 |
Paper Desktop not running or no file loaded | Open Paper Desktop and load a file. The server only starts when a file is active. |
| Connection refused on Windows WSL | WSL networking can't reach Windows localhost | Enable mirrored mode networking in .wslconfig, or use the Windows host IP. |
| Rate limit errors after upgrading Paper Desktop | MCP rate limits didn't reset after upgrade | Update to the latest Paper Desktop version. Restart Paper Desktop and the agent. |
| Agent hallucinates tool parameters | LLM fabricating MCP tool signatures | Re-add the MCP server. Check that the agent sees the correct tool list. Try a shorter prompt. |
Warning: Paper Desktop is macOS and Windows only as of May 2026. Linux users cannot run the MCP server locally. The web version (app.paper.design) does not expose an MCP endpoint. This is the most significant limitation of the Paper workflow.
Paper's MCP server exposes 22 tools. Here are the most important ones for design-to-code workflows:
| Tool | Purpose | Key Parameters |
|---|---|---|
get_screenshot |
Capture a node as a base64 image | Node ID, scale (1x or 2x) |
get_jsx |
Export a node as JSX (Tailwind or inline styles) | Node ID, format preference |
write_html |
Parse HTML and add or replace nodes | HTML string, mode (insert or replace) |
export |
Export nodes as PNG, JPG, SVG, MP4 | Node IDs, format, scale |
create_artboard |
Create a new artboard | Name, width, height |
update_styles |
Update CSS styles on nodes | Node IDs, style properties |
get_computed_styles |
Read computed CSS styles for nodes | Node IDs (batch supported) |
get_tree_summary |
Compact hierarchy of a node's subtree | Node ID, optional depth limit |
The full tool set includes get_basic_info, get_selection, get_node_info, get_children, get_fill_image, get_font_family_info, get_guide, set_text_content, rename_nodes, duplicate_nodes, move_nodes, and finish_working_on_nodes. Appendix B covers every tool in detail.
Paper Workflows: Design-to-Code and Code-to-Design
Paper supports two primary workflows: design-to-code (export from canvas to code) and code-to-design (write code back to canvas). The MCP server makes both possible within a single agent session.
HTML/CSS canvas
Screenshot + JSX + styles
React + Tailwind project
Via write_html tool
Workflow 1: Syncing tokens from Figma to Paper. Run both the Figma MCP server and the Paper MCP server in the same agent session. Here's the step-by-step process:
Start both MCP servers. Open Figma in a browser with the Figma MCP plugin running. Open Paper Desktop with a file loaded. Both servers should appear in your agent's MCP tool list.
Select the source element in Figma. Select an element with a variable or style applied. Tell the agent:
Read the selected element in Figma and create a matching
design system in Paper. Use the same colors, spacing,
and typography tokens.Agent reads and translates. The agent reads the Figma styles via the Figma MCP server, translates them to Paper-compatible CSS, and writes them using write_html or update_styles. The output lands on the Paper canvas immediately.
Verify and iterate. Check the Paper canvas. Compare with the Figma source. Ask the agent to fix any discrepancies.
Gotchas: SVG fills may come through as images rather than vector fills. Spacer elements in Figma are often ignored. Some Figma-specific design patterns don't translate cleanly. Large nested designs can error out on the MCP read. Code-connected components in Figma are unreliable for cross-tool sync.
Workflow 2: Pulling real content from Notion into designs. Connect both Notion MCP and Paper MCP. Ask the agent to pull testimonials, articles, or data from Notion and populate a Paper design. This lets you test designs with real content — including different languages.
Pull the testimonials from our Notion database and populate
the testimonial cards in my Paper design. Use the first 3 entries.
The agent reads the Notion database, extracts the content, and uses write_html to populate the Paper cards. The result is a design filled with real copy instead of lorem ipsum.
Workflow 3: Building a website from a Paper design. This is the most powerful workflow. Select the hero frame in Paper. Ask the agent:
I'd like you to build a website in this folder using the hero section
I have selected in Paper. Use React and Tailwind for the styling.
The agent reads the design via MCP (screenshot + JSX + computed styles), creates a project folder, generates the React components with Tailwind classes, and commits the result. Here's what the agent does internally:
Read. Calls get_screenshot to see the design visually. Calls get_jsx to get the Tailwind markup. Calls get_computed_styles to get exact spacing and color values.
Generate. Creates a React component file with the JSX from Paper. Adds Tailwind classes. Sets up the project structure (package.json, tailwind config, etc.).
Commit. Stages and commits the generated code.
$ git add . && git commit -m "feat: hero section from Paper design"Best results come when the Paper design uses flex layouts and container-based structure rather than absolute positioning.
Start small — a hero section first. Then add responsive breakpoints:
Can you add some responsive breakpoints to the website based on the
frames I have selected in Paper? Each frame is a different breakpoint.
The agent reads each frame as a breakpoint variant and generates the corresponding media queries. Chapter 12 covers the full production pipeline.
My take: Paper's get_jsx tool is the single most time-saving feature in the agentic design ecosystem. Translating a design to JSX by hand takes 30-60 minutes per component. get_jsx does it in seconds. The output is clean Tailwind markup that's often production-ready. The limitation: Paper Desktop must be running, which excludes Linux users as of May 2026.
Pencil: Vector Design Inside Your IDE
Pencil (pencil.dev) takes a different approach. It's a vector design tool that integrates directly into your IDE. The tagline: "Design on canvas. Land in code." Unlike Paper's HTML/CSS canvas, Pencil provides a native vector design experience — layers, paths, boolean operations, the works — but it lives inside the development environment, not in a separate browser tab.

Pencil bridges design and development by putting both in the same environment. The key concepts:
| Concept | What It Does | Design-as-Code Benefit |
|---|---|---|
| .pen files | Design artifacts stored in the repo | Diffable, versionable, reviewable |
| Variables | Design tokens with theme values | Tokens live in the design file |
| Components | Reusable design elements | Design system consistency |
| Slots | Component composition mechanism | Flexible component variants |
| Code on Canvas | Run code within the design surface | Design and code in one view |
| Design Libraries | Shared design system collections | Cross-project consistency |
Chapter 04 covered the mental model behind these concepts. Pencil makes them tangible inside VS Code or Cursor. You open a .pen file in the editor. A canvas appears. You design on the canvas. The file saves to disk. Git tracks the changes. An agent reads the file via MCP and modifies it. The canvas updates.
The integration with the development workflow is tighter than Paper's. Pencil doesn't just connect to your IDE — it runs inside it. The canvas is a tab in your editor. You can see your code and your design side by side. When the agent modifies the .pen file, the canvas updates in real time, and the diff appears in your editor's SCM panel.
Components in Pencil work like React components. You define a component once, then instantiate it everywhere. Slots let you swap content inside a component — the same card component can hold different text, images, or even other components. When you update the master component, every instance updates. This is the same pattern as React props, but it operates on the visual canvas.
Variables add another layer. Define your brand colors, spacing scale, and typography as variables in the .pen file. Apply them to components. When the agent changes a variable value, every component that references it updates across the entire design. This is how you maintain design system consistency without manually updating each component.
Code on Canvas is Pencil's bridge between visual design and live code. You can embed code that runs inside the design surface — generating data visualizations, rendering dynamic content, or displaying API responses directly on the canvas. The agent can write and modify this embedded code, creating designs that respond to real data rather than static mockups.
The .pen File Format and Pencil CLI
The .pen file format is Pencil's native design-as-code format. It's structured, parseable, and designed for git. The format supports all of Pencil's core concepts: nodes, styles, components, variables, and layout rules.
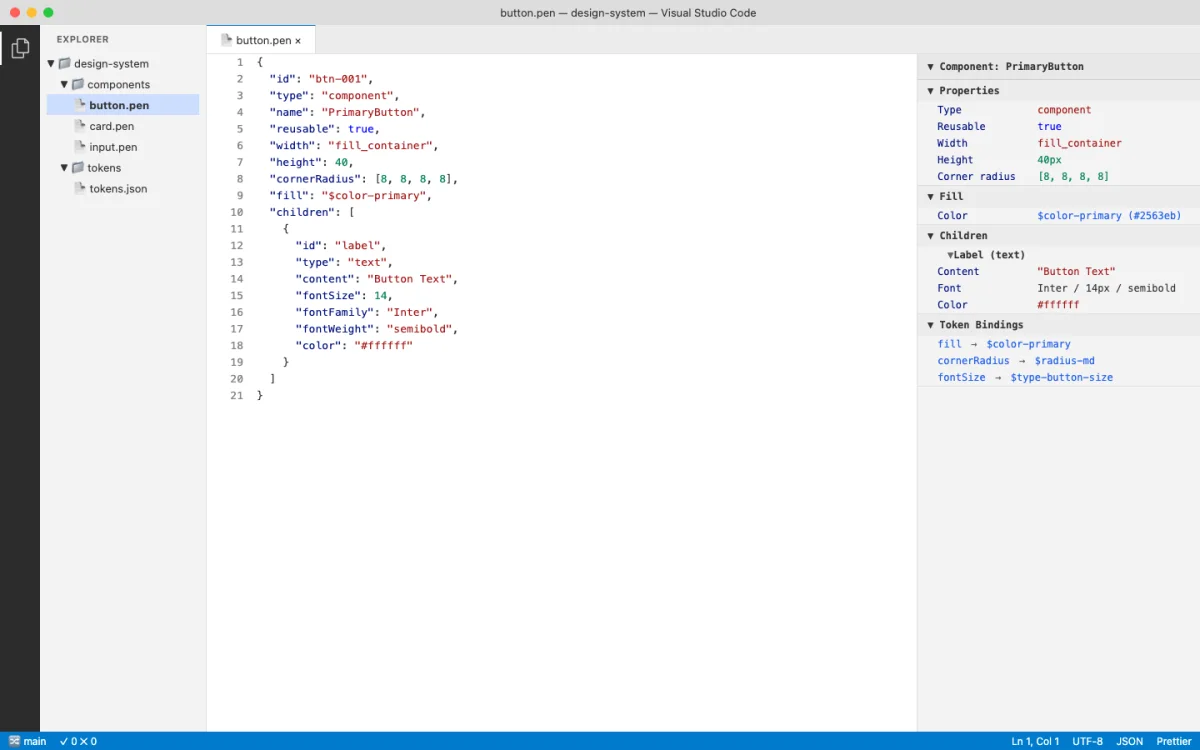
A simplified conceptual view of a .pen file structure:
{
  "variables": {
    "color-primary": {
      "type": "color",
      "values": {
        "default": "#0066CC",
        "dark": "#3399FF"
      }
    },
    "spacing-unit": {
      "type": "dimension",
      "values": {
        "default": "4px"
      }
    }
  }
}
Variables can hold different values per theme. Light mode gets #0066CC. Dark mode gets #3399FF. When the agent reads the file with resolveVariables: true, it gets the computed value for the active theme. This is the same pattern as CSS custom properties with media query overrides, but it lives in the design file.
Pencil CLI provides command-line access to .pen files. This is useful for CI pipelines, batch operations, and agent-driven workflows that don't need a GUI:
# Validate tokens and components
$ pencil validate design.pen

# Export assets for production
$ pencil export design.pen --format svg

# Export tokens as CSS custom properties
$ pencil tokens design.pen --format css
In a CI pipeline, you can validate that all design tokens are correctly defined and that no component references a missing variable:
# .github/workflows/design-ci.yml (conceptual)
name: Design CI
on: [push]
jobs:
  validate:
    runs-on: ubuntu-latest
    steps:
      - uses: actions/checkout@v4
      - run: pencil validate design.pen
      - run: pencil tokens design.pen --format css --output tokens.css
Design Libraries extend this further. A library is a collection of components, variables, and styles shared across projects. Your team can maintain a single design library that every .pen file references. When the library updates, every design file that depends on it gets the changes. This works the same way as an npm package — your design system is versioned, shared, and consumed as a dependency.
Import and export capabilities round out the format. Pencil can import SVG, PNG, and Figma files. Export targets include SVG, PNG, PDF, and code generation. The Figma import is useful for migrating existing designs: open the .fig file in Pencil, and it converts the layers, styles, and components into the .pen format. The conversion isn't perfect — some Figma-specific features like auto-layout translate differently — but it preserves the structure well enough to continue designing.
Design-to-Code Sync with Pencil
Pencil's design-to-code sync is bidirectional. Design changes propagate to code. Code changes propagate to design. The sync happens through the .pen file format and Pencil's MCP integration.
The sync workflow, with concrete agent prompts at each step:
Design in Pencil. Open a .pen file in the IDE. Design on the canvas using Pencil's vector tools. Variables and components are defined in the file.
Agent reads the design. Via Pencil's MCP server, the agent reads the .pen file, extracts component structures, reads variable values, and understands the layout hierarchy. The prompt:
Read the design file landing.pen and generate a React component
for the hero section. Map .pen variables to CSS custom properties.Agent generates code. The agent produces React components, Tailwind classes, or HTML/CSS that matches the design. Design variables map to CSS custom properties:
:root {
  --color-primary: #0066CC;    /* from .pen variable color-primary */
  --spacing-unit: 4px;         /* from .pen variable spacing-unit */
  --radius-sm: 4px;            /* from .pen variable radius-sm */
}Agent writes code changes back. Via the MCP server, the agent can update the .pen file directly. The prompt:
Update the button component in landing.pen to use a larger
corner radius (12px instead of 8px) and add a hover state.
The agent modifies the .pen file. The canvas updates. The diff appears in your editor's SCM panel. This closes the loop: code changes reflect in the design canvas.
The bidirectional sync means the design file stays in sync with the implementation. No more design files rotting in Figma while the codebase diverges. The .pen file is the source of truth for both design and code.
Building a Real Workflow: Paper to Production
This section walks through a complete workflow: designing in Paper, generating code with an agent, and deploying to production.
Design the hero section in Paper. Open Paper Desktop. Create a new file. Design the hero section with a headline, subhead, CTA button, and a feature image. Use flex layouts for structure. Name the artboard "Hero".
Connect the agent. Ensure Paper MCP is configured in your agent (section 05.2). Open a terminal in the project folder. Start a new agent session. Verify the connection:
Create a small test rectangle in Paper to verify the MCP connection.Generate the hero component. Select the Hero artboard in Paper. Ask the agent to build it:
Build a React + Tailwind hero component from the Hero artboard
I have selected in Paper. Use semantic HTML and add hover states
to the CTA button.
The agent calls get_screenshot to see the design, get_jsx to get the Tailwind markup, and get_computed_styles to get exact values. Then it generates a Hero.tsx component with responsive styles and hover interactions.
Design the remaining sections. In Paper, design the Features section, Testimonials section, and Footer. Each section gets its own artboard. Use the same design tokens across all sections.
Generate the full page. Ask the agent to build each section and compose them into a single page:
Now build the Features, Testimonials, and Footer sections from
the artboards I've selected. Compose all sections into a single
page component with responsive breakpoints.Commit and deploy. Have the agent commit the changes:
$ git add . && git commit -m "feat: landing page from Paper design"| Step | Tool | Agent Role |
|---|---|---|
| 1. Design hero | Paper Desktop | None — human designs |
| 2. Connect agent | Paper MCP | None — configuration |
| 3. Generate hero | Paper MCP + Agent | Read design, generate code |
| 4. Design remaining | Paper Desktop | None — human designs |
| 5. Generate full page | Paper MCP + Agent | Read sections, compose page |
| 6. Commit and deploy | Git + Agent | Commit, optionally deploy |
The total time for this workflow: 30-90 minutes depending on design complexity. The agent handles the tedious parts — translating layouts, writing responsive breakpoints, mapping tokens to CSS custom properties. You focus on design direction. The agent handles execution.
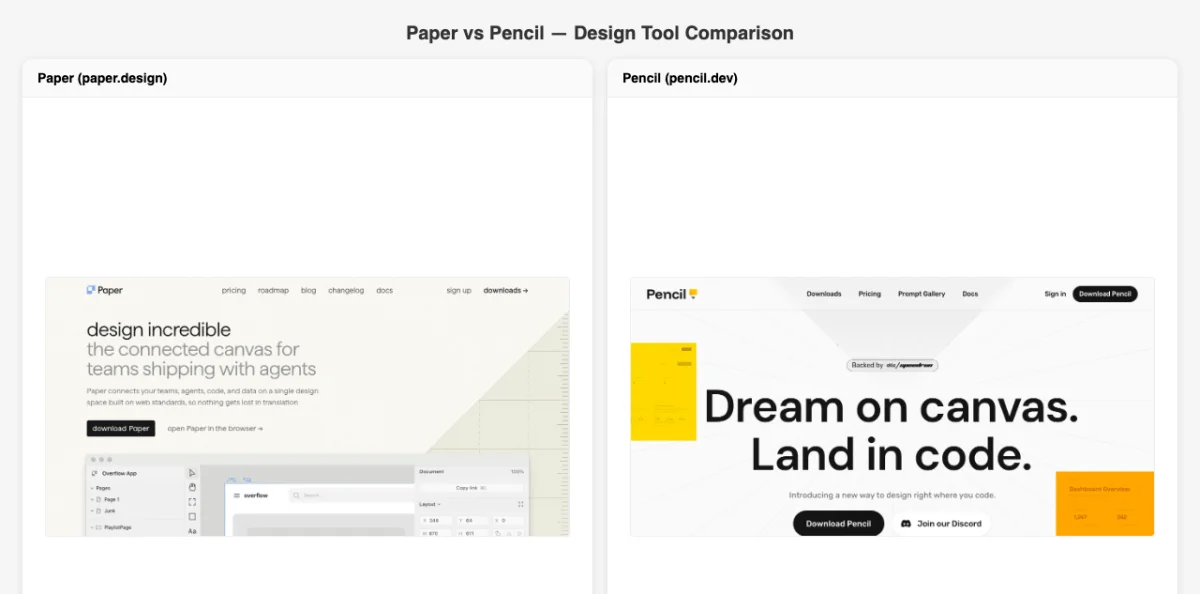
Paper and Pencil solve overlapping problems from different angles. Here's how they compare:
| Dimension | Paper | Pencil |
|---|---|---|
| Design surface | HTML/CSS canvas | Vector canvas in IDE |
| File format | HTML (in Paper's cloud) | .pen (in your repo) |
| Agent connection | MCP server (HTTP) | MCP server + file system |
| Code export | get_jsx → Tailwind/JSX |
.pen → code generation |
| Best for | Web designs, landing pages | Component libraries, design systems |
| Linux support | No (Desktop required) | Yes (VS Code extension) |
My take: The Paper-to-production workflow is the most practical agentic design workflow I've used. It's not perfect — the agent sometimes misinterprets complex layouts, and you need to review the generated code carefully. But it eliminates the most tedious part of front-end development: translating a finished design into working code. Start with a small section, validate the output, then scale up.
Bookmark: Anti-slop skills as design guardrails
The repository contains a Gemini-focused SKILL.md for custom HTML website design. The useful idea is explicit negative direction: avoid template habits such as glass panels, cyber-neon palettes, predictable section stacks, and generic AI layout patterns while pushing for image-led composition, richer typography, intentional motion, and crafted micro-interactions.
Anti-template design is not a style preference. It is a quality-control problem that appears whenever an agent is asked to produce a website without enough taste, structure, and negative constraints.
I read an anti-slop skill as a compact design review protocol. It does not make the agent tasteful by itself; it names the failure modes I want the agent to avoid before the first screen is generated.
For website work, those failure modes are easy to recognize: repeated card grids, vague SaaS gradients, decorative glass panels, weak hero sections, empty stock-like composition, and motion that exists only because the tool can animate. A useful skill turns those patterns into explicit constraints the agent must work around.
The value of a SKILL.md file is that it makes this critique reusable. Instead of writing "make it less generic" after every first draft, I can ask the agent to begin with stronger art direction: image-led composition, deliberate typography, custom section rhythm, purposeful GSAP or Lottie motion, and micro-interactions that support the product story.
I would still test the skill against a real brief before trusting it. The comparison is simple: run the same landing-page task with the default prompt and then with the anti-slop skill loaded. Keep it only if the second version gives me a more specific visual direction and fewer generic AI layout habits to correct.
Bookmark: Figma export as agent context
MagicPath Figma Connect is the relevant MagicPath documentation for moving Figma context into an agent workflow.
The gap between design tools and agent tools is still one of the weak points in the workflow. A useful export flow should move structure, naming, layout, and intent into the agent's context without forcing the designer to describe the same artifact again in prose.
I only care about a Figma export workflow if it gives me more control over the agent's working context. A tool belongs in the stack when it helps me carry intent, examples, constraints, and critique through the work with less translation.
The operating experiment is small: choose one artifact, give the agent the same brief through the current workflow and the new workflow, then inspect what changed in the output and the review loop.
The habit is simple: do not adopt the tool because it is visible in the market; adopt it only when it makes the design loop easier to direct.
Next: Chapter 06 covers the open-source alternatives: Open Design (43k+ stars, 31 skills) and OpenPencil (3k+ stars, concurrent Agent Teams). If Paper and Pencil are the commercial options, Open Design and OpenPencil are the community-driven counterparts — with different trade-offs and capabilities.