Why Agents Need Programmatic Video
Traditional video tools --- Premiere, After Effects, Final Cut --- require GUI interaction. Agents can't click timeline scrubbers. They can't drag keyframes. They can't adjust bezier curves on easing functions with a mouse. Programmatic video frameworks solve this by treating video as code: versionable, diffable, reproducible.
The shift mirrors what happened with design. Design moved from GUI-only tools (Photoshop) to code-friendly formats (CSS, HTML, design tokens). Video is making the same transition. The timing matters because agents can now produce video artifacts the same way they produce code and design --- by writing text that compiles to frames.
Three use cases drive agent-driven video production in practice. First, product marketing: a startup needs a 60-second product intro, and the designer writes it once with code rather than editing frames manually. Second, personalized video at scale: a SaaS company generates thousands of onboarding videos, each with the customer's name and usage data. Third, design documentation: a team produces animated walkthroughs of UI flows, generated directly from the design system tokens covered in Chapter 08.
Two approaches have emerged. Remotion uses React components as the authoring format. Hyperframes uses HTML + GSAP. The philosophical difference sounds minor. In practice, it shapes everything: how you author, how you preview, how you debug, how you render, and what your license allows.
Remotion: React-Based Video Production
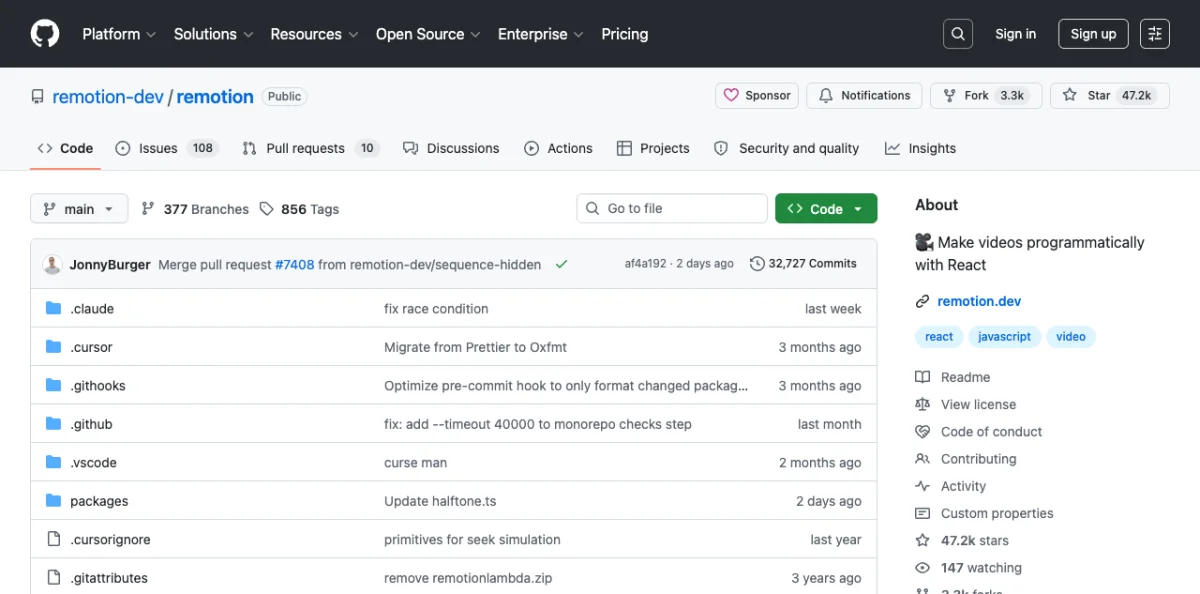
Remotion is the established player. Created by Jonny Burger (Remotion AG), 47.1k GitHub stars, 3.3k forks, 622+ releases as of May 2026. The current version is v4.0.462. It's TypeScript-first (74.5%), with PHP for Lambda rendering and Rust for native components. The ecosystem is substantial: 3M npm installs, 800+ pages of documentation, 35+ templates, 8000+ Discord members, and 300+ contributors. Trusted by GitHub, Musixmatch, Wistia, and SoundCloud.
The mental model: your video is a React component tree. Each frame is a render of that tree at a specific point in time. The framework handles the mapping between time and component state. If you know React, you know most of Remotion already.
Core primitives:
| Primitive | Purpose | Key Props |
|---|---|---|
<Composition> |
Registers a renderable video | id, fps, durationInFrames, width, height |
<Sequence> |
Time-shifts child components | from, durationInFrames |
<Series> |
Plays sequences back-to-back | Auto-calculated timing |
spring() |
Physics-based animation | mass, damping, stiffness |
interpolate() |
Maps frame number to value range | inputRange, outputRange, extrapolateLeft/Right |
useCurrentFrame() |
Hook for current frame number | None |
useVideoConfig() |
Hook for video metadata | Returns fps, width, height, durationInFrames |
// src/Root.tsx — register compositions
import { Composition } from 'remotion';
import { ProductIntro } from './ProductIntro';

export const RemotionRoot: React.FC = () => {
  return (
    <Composition
      id="ProductIntro"
      durationInFrames={150}
      fps={30}
      width={1920}
      height={1080}
      component={ProductIntro}
    />
  );
};
// Frame-dependent rendering
import { AbsoluteFill, useCurrentFrame, interpolate } from 'remotion';
export const ProductIntro = () => {
const frame = useCurrentFrame();
const opacity = interpolate(frame, [0, 30], [0, 1], {
extrapolateRight: 'clamp',
});
const scale = interpolate(frame, [0, 30], [0.8, 1], {
extrapolateRight: 'clamp',
});
return (
<AbsoluteFill style={{
backgroundColor: 'var(--color-background)',
justifyContent: 'center',
alignItems: 'center',
}}>
<div style={{ opacity, transform: `scale(${scale})` }}>
<h1 style={{ fontFamily: 'var(--font-display)' }}>
Introducing the Future
</h1>
</div>
</AbsoluteFill>
);
};// Sequences for timing control
import { Sequence } from 'remotion';
const ProductTrailer = () => {
return (
<>
<Sequence durationInFrames={30}>
<LogoReveal />
</Sequence>
<Sequence from={30} durationInFrames={60}>
<FeatureShowcase />
</Sequence>
<Sequence from={90} durationInFrames={60}>
<CallToAction />
</Sequence>
</>
);
};The spring() function deserves a closer look. Unlike CSS transitions with fixed durations, spring animations are physics-based. You set mass, damping, and stiffness, and the framework calculates the animation curve. This produces motion that feels natural --- objects accelerate, overshoot slightly, and settle.
import { spring, useCurrentFrame, useVideoConfig } from 'remotion';

const AnimatedTitle = () => {
  const frame = useCurrentFrame();
  const { fps } = useVideoConfig();

  const scale = spring({
    frame,
    fps,
    config: {
      stiffness: 100,
      damping: 10,
      mass: 1,
    },
  });

  return (
    <div style={{
      transform: `scale(${scale})`,
      fontFamily: 'var(--font-display)',
    }}>
      Hello World
    </div>
  );
};
Sequences can nest. A sequence inside another sequence is offset by the parent's from value. This composition pattern maps naturally to how real videos are structured: acts contain scenes, scenes contain shots, shots contain elements.
Remotion Studio provides a browser-based preview with timeline scrubbing, a props editor, and a render button. You can deploy Studio to the cloud for non-technical team members to preview and render videos without touching code.
The rendering targets are extensive:
$ npx remotion render ProductIntro                # local MP4
$ npx remotion render --sequence                  # image sequence
$ npx remotion render --output custom.mp4         # custom output path
$ npx remotion render --codec prores              # ProRes for editing
$ npx remotion render --frames=0-29               # render specific range
Beyond local CLI rendering, Remotion supports Node.js SSR API (renderMedia()), AWS Lambda for distributed rendering, GitHub Actions for CI/CD, and Google Cloud Run (alpha as of May 2026). The Lambda integration is mature and production-tested for hyperscale rendering. The SSR API lets you render from any Node.js process, which is particularly useful for agent-driven pipelines.
Setting Up a Remotion Project with Agent Assistance
Quick start:
$ npx create-video@latestThis scaffolds a Remotion project with a src/Root.tsx that registers compositions. Each composition is a React component that receives props and renders frames.
Remotion has first-class agent support. The repository includes .claude/ and .cursor/ directories with CLAUDE.md and AGENTS.md files. This means Claude Code and Cursor understand Remotion's conventions out of the box.
my-video/
├── src/
│   ├── Root.tsx          # registers all compositions
│   ├── ProductIntro.tsx  # composition component
│   └── lib/
│       └── animations.ts # shared animation helpers
├── public/
│   └── assets/           # images, videos, fonts
├── package.json
└── remotion.config.ts
Agents can scaffold the project, write composition components, configure rendering, and even set up Lambda deployment. The Zod schema support on <Composition> enables visual editing of props in Remotion Studio, which agents can configure:
import { Composition } from 'remotion';
import { z } from 'zod';

const productSchema = z.object({
  title: z.string(),
  subtitle: z.string(),
  accentColor: z.string(),
  logoUrl: z.string(),
});

export const RemotionRoot = () => (
  <Composition
    id="ProductIntro"
    component={ProductIntro}
    schema={productSchema}
    defaultProps={{
      title: 'Product Name',
      subtitle: 'Tagline goes here',
      accentColor: '#E94560',
      logoUrl: '/assets/logo.svg',
    }}
    durationInFrames={150}
    fps={30}
    width={1920}
    height={1080}
  />
);
The agent workflow: you describe the video, the agent writes the composition components, you preview in Remotion Studio, you iterate, then you render. The tight integration with design tokens (from Chapter 08) means your video can share the same var(--color-primary) variables as your web UI.
Remotion also provides a Player component for embedding video previews in web applications and a Recorder for screen recording. The Editor Starter is a commercial template for building custom video editing applications on top of Remotion's rendering engine.
Hyperframes: HTML-Native Video Built for Agents
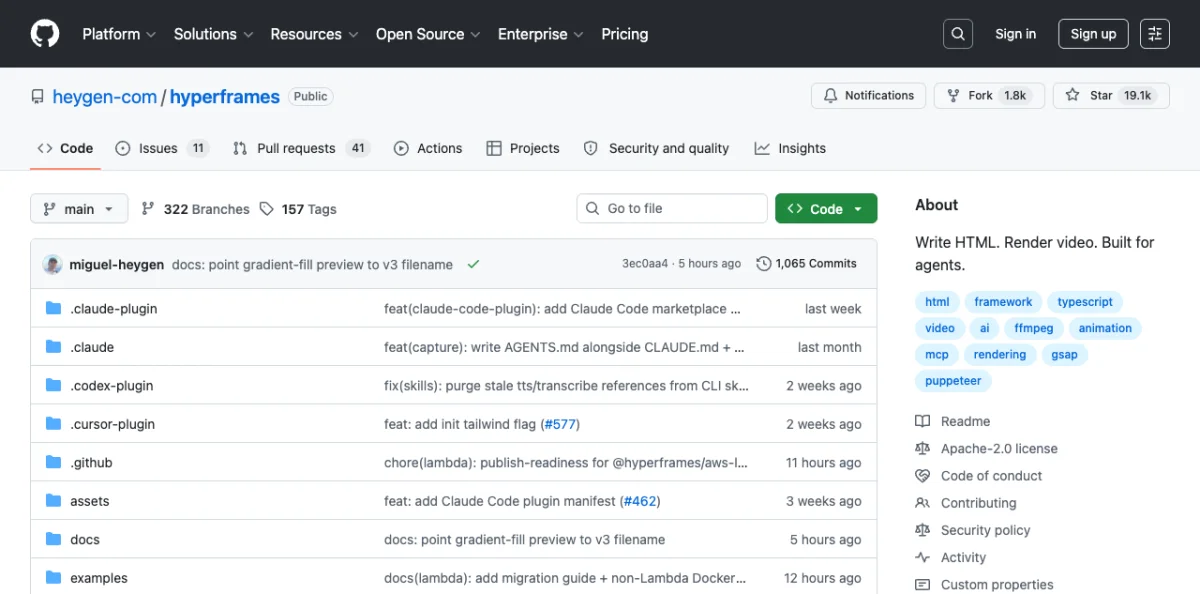
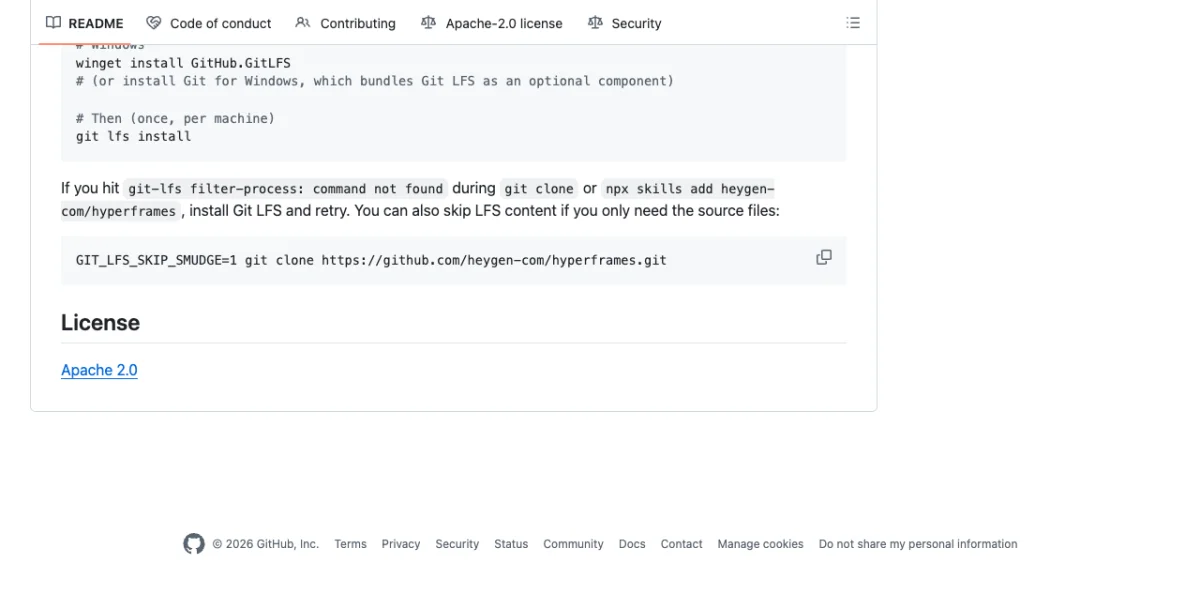
Hyperframes takes a fundamentally different approach. Created by HeyGen, 19k GitHub stars, 1.8k forks, Apache 2.0 license. The tagline is direct: "Write HTML. Render video. Built for agents."
Compositions are plain HTML files with data attributes. No React. No build step. The HTML file is both the render layer and the editable source of truth. This is the same principle that powers Huashu Design (Chapter 07) for prototypes and slide decks --- HTML as the native artifact, not an export target.
The key insight from HeyGen's internal evaluation: LLMs produce more creative output writing HTML+GSAP than React compositions. HTML is lower-friction for language models. No imports to manage. No component lifecycle to reason about. No JSX syntax to get right. The agent writes declarative HTML, adds animation attributes, and the framework handles the rest.
| Attribute | Purpose |
|---|---|
data-composition-id |
Identifies the root element |
data-start |
Start time in seconds |
data-duration |
Duration in seconds |
data-track-index |
Layer ordering (higher = on top) |
data-width / data-height |
Composition dimensions |
data-volume |
Audio volume (0-1) |
<div id="root"
     data-composition-id="product-intro"
     data-start="0"
     data-width="1920"
     data-height="1080">

  <video id="clip-1"
         data-start="0"
         data-duration="5"
         data-track-index="0"
         src="intro.mp4"
         muted playsinline></video>

  <h1 id="title"
      class="clip"
      data-start="1"
      data-duration="4"
      data-track-index="1"
      style="font-size: 72px; color: white;">
    Welcome to Hyperframes
  </h1>

  <audio id="bg-music"
         data-start="0"
         data-duration="5"
         data-track-index="2"
         data-volume="0.5"
         src="music.wav"></audio>
</div>
No React. No JSX. No build step. You write HTML, open it in a browser to preview, and render it to MP4. The data attributes tell the renderer when each element appears, for how long, and in what layer. The track index system is like a video editor's timeline --- elements on higher tracks overlay elements on lower tracks.
The CLI is deliberately non-interactive by default:
$ npx hyperframes init my-video
$ cd my-video
$ npx hyperframes preview         # live preview with hot reload
$ npx hyperframes render          # render to MP4
$ npx hyperframes render --output demo.mp4
$ npx hyperframes add flash-through-white   # add catalog block
$ npx hyperframes lint            # lint composition
$ npx hyperframes doctor          # diagnose issues
The --human-friendly flag enables interactive mode, but the default is flag-driven. This is a deliberate design choice: agents work better with non-interactive CLIs. Every command accepts flags and exits cleanly.
Hyperframes ships with a catalog of 50+ ready-to-use blocks. These are pre-built composition snippets for common patterns: flash-through-white, instagram-follow, title cards, lower thirds, transitions. You add them to your project with npx hyperframes add <block-name> and customize the data attributes. For agents, this means the agent can compose complex videos from building blocks rather than writing every element from scratch.
The Frame Adapter pattern is where Hyperframes' architecture really matters. It supports GSAP, Lottie, CSS animations, Three.js, Anime.js, and Web Animations API. For each adapter, Hyperframes handles deterministic seeking --- it pauses the animation library and scrubs to frame / fps before each capture. This eliminates the wall-clock dependency that plagues other renderers.
My take: Hyperframes' seek-based rendering is technically superior to Remotion's wall-clock approach for animation libraries. GSAP in Remotion races through timelines at wall-clock speed during render, producing mostly-empty frames after the initial frames. Hyperframes pauses GSAP, seeks to the exact time, then captures. If your video uses GSAP heavily, this alone is reason to choose Hyperframes.
Setting Up Hyperframes with AI Agents
The recommended path is skill-based:
$ npx skills add heygen-com/hyperframesThis installs 13 skills that teach the agent framework-specific patterns. Skills register as slash commands in Claude Code: /hyperframes, /hyperframes-cli, /hyperframes-media, /gsap, /lottie, /threejs, and more.
Requirements: Node.js >= 22 and FFmpeg.
For Codex and Cursor, Hyperframes provides dedicated plugins:
# Codex plugin
$ codex plugin marketplace add heygen-com/hyperframes \
    --sparse .codex-plugin --sparse skills --sparse assets

# Claude Code plugin
$ claude --plugin-dir .
Example agent prompts that work well:
"Create a 10-second product intro with a fade-in title."
"Turn this CSV into an animated bar chart race."
"Build a 60-second explainer video with 4 scenes."
"Add background music with ducking when narration plays."
The hyperframes init command installs skills automatically, so you can hand a project to an agent at any point in its lifecycle. Media preprocessing skills handle TTS (via Kokoro), transcription (via Whisper), and background removal (via u2net). The TTS integration is particularly useful for narrated videos --- the agent generates voiceover, measures the duration, and synchronizes visuals to the audio timeline automatically.
There's also a remotion-to-hyperframes skill for migrating React compositions to HTML. Useful if you start with Remotion and want to switch. The migration handles data attribute mapping, sequence-to-track conversion, and GSAP timeline adaptation.
Hyperframes supports two capture modes. BeginFrame mode runs on Linux and is fully deterministic --- no wall-clock dependency. Screenshot mode runs on macOS and Windows, falling back automatically when BeginFrame isn't available. For production CI/CD pipelines, Linux with BeginFrame mode is the recommended setup.
frame.md: Your Design System, Ready for Video
Every brand has a design spec. Colors, typography, spacing, composition rules. These specs are written for the web --- for screens where users scroll, resize, and interact. They are not written for a camera. frame.md bridges this gap. It translates a web-oriented design spec into a video-ready specification that an agent can use to compose branded video without guessing at scale, timing, or motion.
The pipeline:
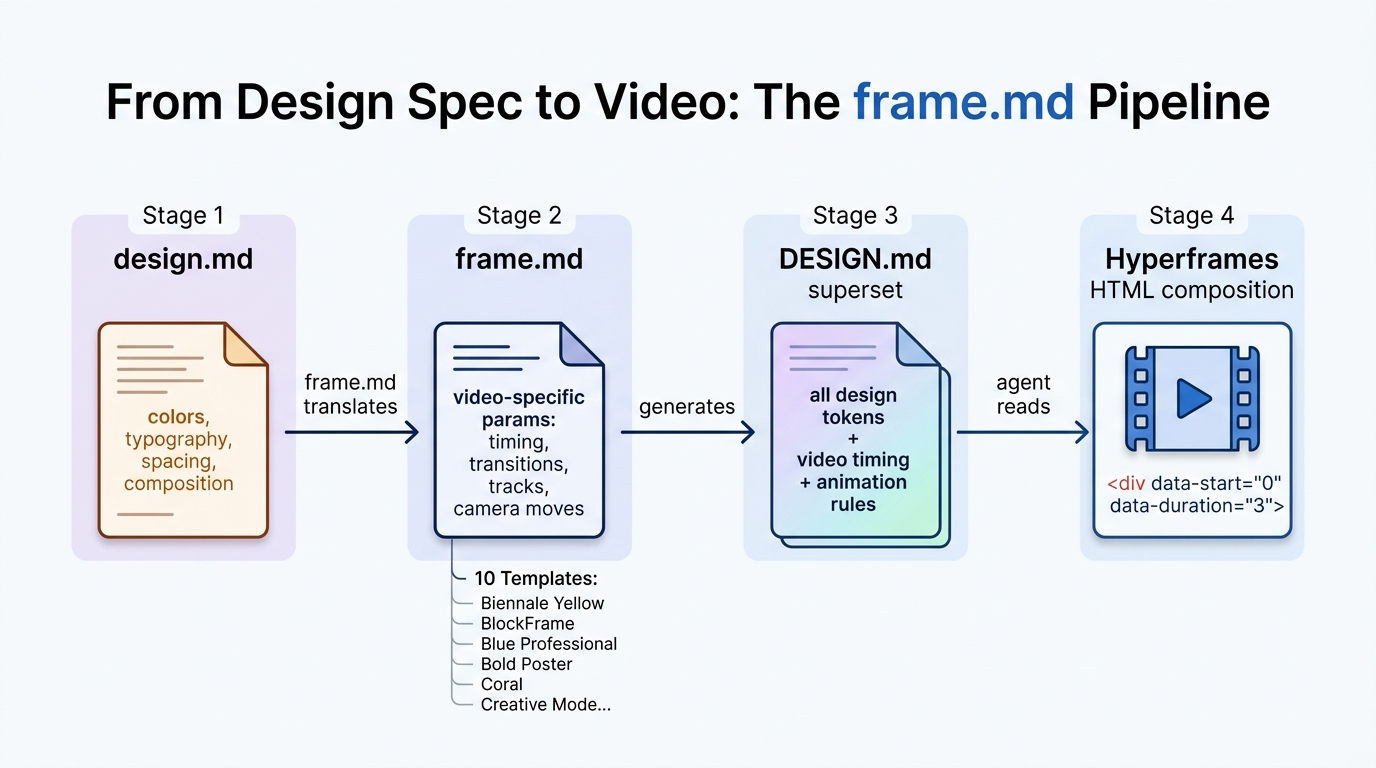
You start with a design.md --- the same format used by Open Design (covered in Chapter 06). frame.md reads your colors, type scale, spacing tokens, and composition rules, then rewrites them for the 16:9 frame. The output is a DESIGN.md superset: all your original design tokens plus video-specific parameters like timing, transitions, track ordering, and camera moves. The agent reads this superset and produces Hyperframes HTML that inherits your brand identity automatically.
The tool lives at hyperframes.dev/design. Paste your design spec, and it returns a frame.md you drop into your project. For teams already using Open Design's DESIGN.md format, this creates a direct path: one spec drives both static output and video output without duplication.
Design Templates
If you don't have an existing design spec, frame.md ships with 10 templates. Each template maps a visual identity to video-appropriate defaults:
| Template | Visual Character | Motion Style | Best For |
|---|---|---|---|
| Biennale Yellow | Warm parchment, solar yellow bloom, Instrument Serif | Slow fades, generous pauses | Art, culture, editorial |
| BlockFrame | Thick black borders, hard offset shadows, candy accents | Hard cuts, snap transitions | Startups, tech launches |
| Blue Professional | Cobalt primary, Space Grotesk display, Inter body | Clean wipes, measured pace | Enterprise, B2B, SaaS |
| Bold Poster | Shrikhand tilted display, red accent on cream | Ken Burns zooms, kinetic type | Marketing campaigns |
| Capsule | Pill-shaped editorial, cream paper, Bodoni Moda serif | Float animations, soft reveals | Lifestyle, fashion, food |
| Cartesian | Minimal sparse, warm parchment, hairline rules | Restrained, data-driven motion | Analytics, dashboards |
| Coral | Bebas Neue uppercase, coral on cream, Inter reading | Bold entrances, sweep reveals | Product announcements |
| Creative Mode | Cream + saturated candy, Archivo Black, JetBrains Mono | Character stagger, chart fills | Developer tools, data viz |
Each template comes with fine-tuning controls for palette and typography. Download the frame pack and drop it into your Hyperframes project. The agent reads the template's DESIGN.md and produces video that matches the template's visual identity.
Skeleton Templates for Common Video Types
frame.md also provides skeleton templates that define scene structure, timing, and transition placement for common video formats:
| Skeleton | Format | Duration | Scenes | Transitions |
|---|---|---|---|---|
| Social Reel | 1080x1920 (portrait) | 15s | 6 | 1 shader at hero reveal, rest hard cuts |
| Launch Teaser | 1920x1080 (landscape) | 25s | 8 | 2-3 shaders at key moments |
| Product Explainer | 1920x1080 | 45s | 12 | Mixed durations, varied transitions |
| Cinematic Title | 1920x1080 | 60s | 7 | Long holds, restrained shaders |
These skeletons give the agent a structural starting point. You tell it "use the Launch Teaser skeleton with the BlockFrame template" and the agent produces an 8-scene, 25-second video with thick borders, hard shadows, and snap transitions at the right moments.
Animation Patterns
frame.md defines reusable animation patterns that map to specific use cases. These are copy-paste ready GSAP snippets the agent can drop into any composition:
| Pattern | What it does | Use case |
|---|---|---|
| Counter animation | Stats animate from 0 to target | Metrics, KPIs, growth numbers |
| SVG stroke draw | Lines and paths draw themselves | Diagrams, flowcharts, data lines |
| Character stagger | Letters enter one by one | Headlines, logos, titles |
| Breathing float | Subtle vertical drift | Logos, icons, floating elements |
| Bar chart fill | Bars grow from bottom sequentially | Data comparisons, benchmarking |
| Highlight sweep | Accent underline sweeps across text | Feature callouts, emphasis |
| Ken Burns | Slow zoom from scale 1 to 1.03 | Background images, hero shots |
For transitions between scenes, 14 shader effects are available, organized by energy level:
| Energy | Shaders | When to use |
|---|---|---|
| Calm | cross-warp-morph, light-leak, domain-warp | Editorial, culture, storytelling |
| Professional | cinematic-zoom, whip-pan, sdf-iris | Enterprise, product demos, B2B |
| Aggressive | glitch, chromatic-split, ridged-burn | Startups, launches, hype videos |
| Ethereal | gravitational-lens, ripple-waves, swirl-vortex | Brand films, ambient, mood |
Example: A Product Launch Video with frame.md
A practical walkthrough. You have a SaaS product launching next month. The brand uses the Blue Professional template (cobalt primary, Space Grotesk display, clean and corporate). You want a 25-second launch teaser.
Step 1: Start the project with the template.
npx hyperframes init product-launch --template blue-professional
cd product-launch
npx hyperframes preview
Step 2: Tell the agent what to build.
Create a 25-second product launch teaser using the Blue Professional
template and the Launch Teaser skeleton (8 scenes).

Scenes:
1. Logo fades in on cobalt background (3s)
2. Tagline animates with character stagger (3s)
3. Feature 1: "Real-time collaboration" with icon animation (3s)
4. Feature 2: "AI-powered suggestions" with counter animation (3s)
5. Feature 3: "One-click deploy" with SVG stroke draw (3s)
6. Social proof: "10,000 teams" with bar chart fill (3s)
7. CTA: "Try free today" with highlight sweep (4s)
8. Logo + URL: breathing float on cobalt (3s)

Transitions: cinematic-zoom at scene 3 and scene 7.
All other transitions: hard cut.
Music: subtle, professional, ducks during text reveals.
Step 3: The agent produces the HTML composition.
<div id="stage" data-composition-id="product-launch"
     data-start="0" data-width="1920" data-height="1080" data-duration="25">

  <!-- Scene 1: Logo -->
  <div class="clip" id="s1" data-start="0" data-duration="3" data-track-index="0">
    <div class="scene-content" style="background: var(--cobalt);">
      <img id="logo" src="logo.svg" />
    </div>
  </div>

  <!-- Scene 2: Tagline -->
  <div class="clip" id="s2" data-start="3" data-duration="3" data-track-index="0">
    <div class="scene-content">
      <h1 class="display" style="font-family: 'Space Grotesk';">
        Build faster. Ship smarter.
      </h1>
    </div>
  </div>

  <!-- Scene 3: Feature 1 -->
  <div class="clip" id="s3" data-start="6" data-duration="3" data-track-index="0"
       data-transition="cinematic-zoom" data-transition-duration="0.5">
    <div class="scene-content">
      <img src="collab-icon.svg" />
      <h2>Real-time collaboration</h2>
    </div>
  </div>

  <!-- ... scenes 4-7 follow same pattern ... -->

  <!-- Scene 8: Logo + URL -->
  <div class="clip" id="s8" data-start="22" data-duration="3" data-track-index="0">
    <div class="scene-content" style="background: var(--cobalt);">
      <img id="logo-end" src="logo.svg" />
      <p class="url">example.com</p>
    </div>
  </div>

  <audio data-start="0" data-duration="25" data-track-index="2"
         data-volume="0.3" src="bg-music.wav"></audio>
</div>
Step 4: Review, refine, render.
npx hyperframes preview    # watch it in the browser
npx hyperframes lint       # check for timing issues
npx hyperframes render     # produce the MP4
The agent applied the Blue Professional template's typography (Space Grotesk display, Inter body) and colors (cobalt primary, cream background) automatically. The character stagger on the tagline, the counter animation on "10,000 teams," and the cinematic-zoom transitions at scenes 3 and 7 all came from the frame.md animation patterns. The agent didn't invent the visual language. It composed from the template's vocabulary.
When to Use frame.md
frame.md solves the cold-start problem for agent-generated video. Without it, the agent has to make every visual decision from scratch: what colors to use, what typeface, how fast to animate, when to transition. With frame.md, the brand decisions are already made. The agent's job is composition, not art direction.
This matters for three scenarios:
Scenario 1: A team with an existing design system. You maintain a DESIGN.md (Open Design format) or a Figma-based design system with extracted tokens. You want to produce branded video content without hiring a motion designer. frame.md translates your existing spec into video parameters. The output inherits your brand identity without manual configuration.
Scenario 2: Rapid video iteration. You produce multiple video variants for A/B testing social ads. Each variant needs different copy and different feature callouts but the same brand identity. With frame.md, you change the copy in each composition while the visual system stays consistent. Render ten variants in one batch.
Scenario 3: Agent-driven video at scale. A content team runs 50 product videos per month across multiple brands. Each brand has its own frame.md template. The agent selects the right template based on the product's brand, composes the video from the template's animation patterns, and renders. No human touches the visual identity. Humans review the narrative and the data accuracy.
My take: frame.md is the connective tissue between this chapter and Chapter 08 (Design Systems and Tokens). Your design system now has a path to video output that does not require a separate motion design effort. The agent reads the design spec, the frame.md template translates it, and the Hyperframes engine renders the result. This is the design-as-code principle extended to video: the same tokens, the same rules, the same review process, just a different output format.
From Reference Video to Animation: Agent-Driven Motion Extraction
Motion design often starts from reference. You see an animation on stripe.com, in an Apple keynote, or in a competitor's app, and you want to replicate it. The traditional approach is to describe the motion in words, let the agent interpret those words, and iterate through several failed attempts. The agent's mental model of "smooth ease-out with a slight overshoot" never matches what you actually saw.
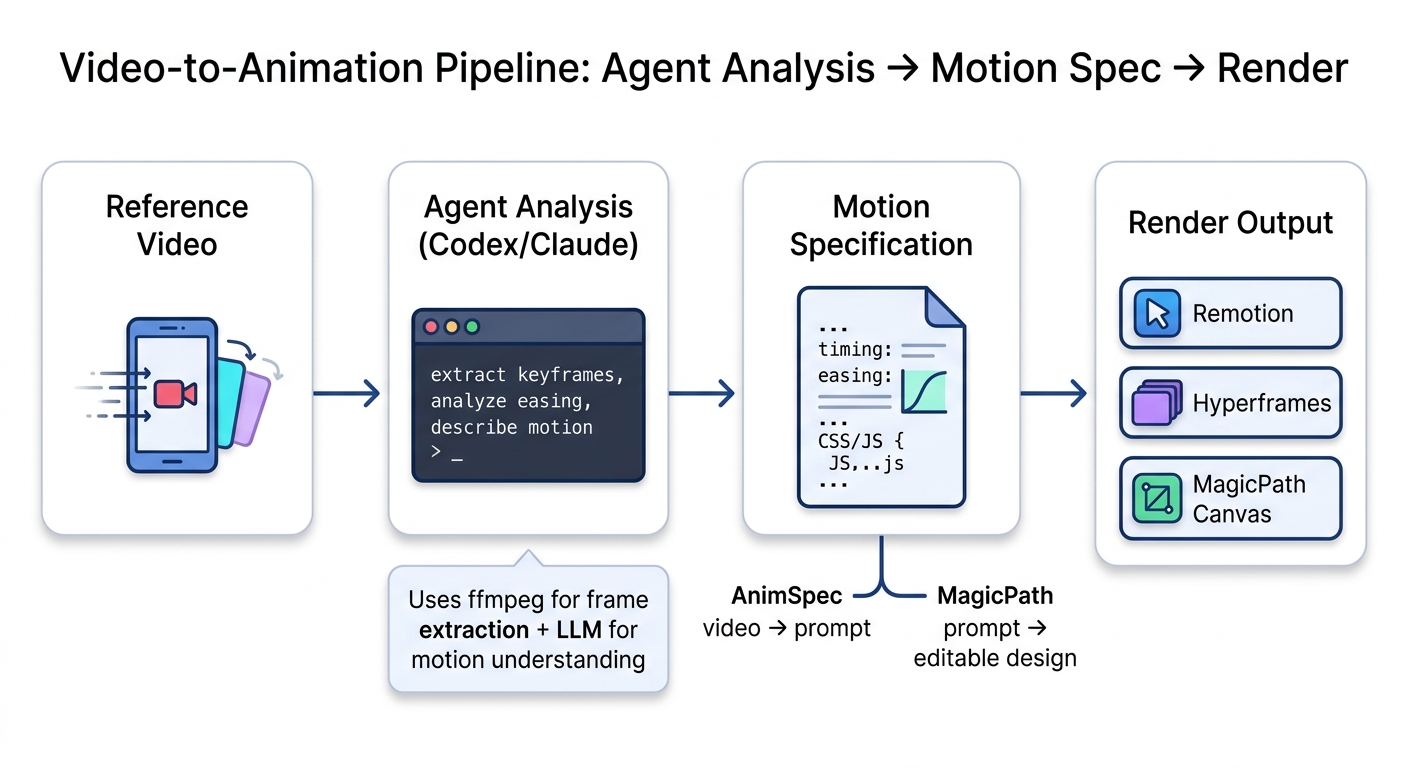
A better approach emerged in mid-2026: drop the reference video into an agent session, let the agent analyze the motion, and produce a structured specification you can feed into Remotion, Hyperframes, or MagicPath. The agent does the hard part --- frame extraction, timing analysis, easing identification --- and you get an accurate starting point instead of a vague description.
How the Agent Analyzes Video
The agent does not watch video the way you do. It breaks the video into frames, inspects the differences between consecutive frames, and builds a structured description of what moves, when, and how. Pietro Schirano demonstrated this workflow with Codex: drag a video into the prompt, tell Codex to "recreate these animations," and it analyzes the motion and generates implementation code (source: @skirano, retrieved 2026-06-03).
The process works in three steps:
- Frame extraction. The agent uses
ffmpegto split the video into individual frames at the source framerate. A 10-second video at 30fps produces 300 frames. The agent can also sample at lower rates for faster analysis. - Motion analysis. The agent compares consecutive frames to identify what changed. It looks for position shifts (translate), size changes (scale), opacity transitions (fade), rotation, color shifts, and timing. The LLM's visual understanding turns pixel differences into structured motion descriptions.
- Specification generation. The agent produces a structured output: element, property, start value, end value, duration, easing function, and delay. This specification is the bridge between the reference video and your rendering tool.
This is not a Codex-specific capability. Any agent with access to ffmpeg and visual understanding can do it. Claude Code, Codex, Cursor, and OpenCode all support the workflow. The key requirement is that the agent can process the video frames, which means either native multimodal support or a preprocessing step that converts frames to images the agent can inspect.
AnimSpec: Video-to-Prompt Extraction
AnimSpec (animspec.com) automates this extraction. You upload a screen recording, choose an output format, and AnimSpec produces a structured prompt your coding agent can implement. It offers 16 output formats covering UI cloning, animation recreation, design token extraction, and UX audits.
The service runs on Google Gemini models: Gemini 2.5 Flash for fast analysis (1 credit), Gemini 3 Flash for balanced (3 credits), and Gemini 3.1 Pro for precise analysis (20 credits). The output is a text prompt, not code --- you paste it into your agent session and the agent writes the implementation.
For the motion design workflow, the relevant formats are:
| Format | What it produces | Best for |
|---|---|---|
| Clone UI Animation | Structured motion spec with timing, easing, and CSS/JS implementation code | Recreating specific animations from reference |
| Clone UI Component | Full component specification including layout, styles, and interactions | Rebuilding an entire UI element with its animations |
| Extract Design Tokens | Color, spacing, typography, and animation values as structured tokens | Building a motion design system from reference |
| Export | Production-ready code in React, Vue, or Svelte | Direct implementation without agent interpretation |
The AnimSpec workflow is: record your screen → upload → choose format → get prompt → paste into agent. It handles the frame extraction and motion analysis that your agent would otherwise need to do manually with ffmpeg.
MagicPath: Agent-to-Design Handoff
MagicPath takes a different approach. Instead of producing a prompt for your coding agent, it provides a shared canvas where external agents (Claude Code, Codex, Cursor) can build editable designs directly. The agent analyzes the video, generates the motion specification, and creates the animation on the MagicPath canvas --- no manual paste step required (source: MagicPath Documentation, retrieved 2026-06-04).
The workflow from Schirano's demonstration: drag a video into Codex, tell it to "recreate these animations in MagicPath," and Codex analyzes the motion, generates the design files, and sends them to the MagicPath canvas. When Schirano was asked about credit costs, his response was: "If you use external agents like in this example, it costs 0 MagicPath credits." The agent does the work; MagicPath receives the output.
Installation is a single command:
npx skills add https://github.com/magicpathai/agent-skills --skill magicpathAfter installation, the agent knows how to read from and write to the MagicPath canvas. It can create new designs, modify existing ones, and pull designs from MagicPath into your codebase. The skill works with any external agent: Claude Code, Codex, Cursor, and the Claude mobile app. MagicPath does not need to be open --- the canvas lives in the cloud and the agent communicates with it via API.
For the motion design workflow, the MagicPath skill enables this pattern: your agent analyzes a reference video, extracts the motion parameters, and builds the animation directly on the canvas. You then review it visually, make edits in the visual editor, and export production-ready code when it looks right. The entire loop --- from reference video to editable animation --- runs through one agent session.
Fitting Extraction into the Motion Stack
These tools solve different parts of the same problem. AnimSpec extracts motion from video and produces a prompt. MagicPath receives an agent's output and renders it on an editable canvas. Remotion and Hyperframes render production video from code. They compose into a pipeline:
| Stage | Tool | Input | Output |
|---|---|---|---|
| 1. Extract motion | Agent + ffmpeg, or AnimSpec | Reference video | Structured motion spec / prompt |
| 2. Generate animation | Agent (Claude Code, Codex, Cursor) | Motion spec | Animation code (CSS, GSAP, React) |
| 3. Render video | Remotion or Hyperframes | Animation code | MP4, WebM, GIF |
| 3a. Editable design | MagicPath | Animation code | Canvas design (visual editing) |
You can skip stages depending on your needs. If you want production video, the full pipeline runs extract → generate → render. If you want an editable prototype to share with your team, extract → generate → MagicPath. If you already know what motion you want and just need to code it, skip extraction and go straight to generate → render.
The extraction step is where agent capability matters most. A good agent extracts accurate timing, identifies the correct easing function, and distinguishes between simultaneous and sequential animations. A less capable agent produces vague descriptions like "fades in smoothly" that still require manual interpretation. This is where AnimSpec's structured analysis adds value: it standardizes the extraction so the output quality does not depend on which agent you use.
Practical Workflow: Recreating a Competitor's Onboarding Animation
A concrete example ties the tools together. You see a competitor's onboarding flow with smooth card transitions and want to replicate the motion pattern in your own product.
Step 1: Capture the reference.
Screen-record the competitor's onboarding flow. A 15-second recording at 60fps is sufficient.
Step 2: Extract the motion.
Option A --- use an agent directly:
# In Claude Code or Codex
# Drop the video file into the session

"Analyze this onboarding animation. Extract:
1. Each card transition: start position, end position, duration, easing
2. The stagger delay between sequential elements
3. Any scale or opacity changes during transitions
4. The overall timeline: when does each animation start and end

Output as structured JSON with CSS animation equivalents."
Option B --- use AnimSpec:
# Upload to animspec.com, select "Clone UI Animation"
# Paste the generated prompt into your agent session
Step 3: Generate the animation.
For Remotion:
"Using the motion spec I just extracted, create a Remotion composition
for a 3-card onboarding carousel. Each card slides in from the right
with the same timing and easing as the reference. Use spring()
for physics-based motion. Total duration: 180 frames at 30fps."
For Hyperframes:
"Using the motion spec, create a Hyperframes scene with GSAP timelines
for the card transitions. Match the reference easing values exactly.
Use our frame.md template for consistent styling."
For MagicPath:
"Using the MagicPath skill, recreate the onboarding animation from
this reference video in my open project. Match the card transitions,
timing, and easing."
Step 4: Iterate and render.
Review the output. If the timing is off, tell the agent which element to adjust: "The second card enters 200ms too early. Push it back." If the easing feels wrong: "Change the ease-out to cubic-bezier(0.16, 1, 0.3, 1)." The structured spec from step 2 gives you precise control over individual parameters.
My take: Video-to-animation extraction is the missing piece in the motion design stack. The current workflow for reference-driven motion is broken: you describe what you see in words, the agent interprets those words, and you iterate on a foundation of ambiguity. Extraction tools fix this by starting from the actual motion parameters instead of a verbal description. AnimSpec standardizes the extraction. MagicPath gives the agent a direct path to editable output. Neither replaces Remotion or Hyperframes for production rendering --- they make those tools more effective by giving them accurate input. Expect this category to grow fast. As agents get better at visual analysis, the extraction step will become a standard part of every motion design workflow.
Animation Runtimes: GSAP, CSS, Lottie, Three.js
The animation runtime is the most consequential technical difference between Remotion and Hyperframes. It affects how every library behaves during rendering. Understanding this difference is essential for choosing the right tool.

GSAP: The primary animation runtime for Hyperframes. Hyperframes pauses GSAP and seeks it to frame / fps before each capture. In Remotion, GSAP's internal performance.now() ticker races through the timeline at wall-clock speed during render. The result: mostly-empty frames after the initial frames. This is not a minor issue. It makes GSAP effectively unusable in Remotion for any non-trivial animation.
// GSAP in Hyperframes — deterministic seeking
const tl = gsap.timeline({ paused: true });
tl.from("#title", { opacity: 0, y: 50, duration: 1 })
  .to("#title", { opacity: 1, y: 0, duration: 0.5 });
// Hyperframes pauses this timeline and seeks to frame/fps before each capture
CSS Animations: Both tools support CSS. Hyperframes uses the Web Animations API adapter for frame-accurate seeking. Remotion renders CSS animations frame-by-frame but can struggle with complex keyframe sequences that depend on computed styles.
Lottie: Hyperframes supports Lottie via window.__hfLottie registration for deterministic seeking. Remotion requires the @remotion/lottie package, which provides a springify utility but adds a dependency.
Three.js: Hyperframes renders from hf-seek events and window.__hfThreeTime instead of wall-clock time. Remotion has @remotion/three for React Three Fiber integration, which works well if you're already in the React ecosystem. The React Three Fiber integration is one of Remotion's genuine strengths --- you get the full React component model for 3D scenes.
Anime.js: Hyperframes registers on window.__hfAnime for deterministic seeking. Remotion has no native Anime.js adapter.
| Runtime | Remotion | Hyperframes |
|---|---|---|
| GSAP | Wall-clock issues during render | Seekable, frame-accurate |
| CSS Animations | Frame-by-frame render | Web Animations API adapter |
| Lottie | @remotion/lottie package |
window.__hfLottie registration |
| Three.js | @remotion/three (React Three Fiber) |
hf-seek events |
| Anime.js | No native adapter | window.__hfAnime |
| WAAPI | Not documented | document.getAnimations() seeking |
The pattern is clear. Hyperframes supports more animation runtimes with deterministic seeking. Remotion supports fewer runtimes but integrates deeply with the React ecosystem. If your video relies on GSAP, the choice is straightforward. If your video is pure React with spring animations, Remotion is the natural fit.
Rendering, Preview, and the Dev Loop
The development loop differs significantly between the two tools. This affects how fast you can iterate, which matters more in agent workflows than in traditional video production.
Remotion Studio: A browser-based application with a sidebar, timeline, props editor, and render button. You edit code, the studio live-reloads, you scrub the timeline to check timing. Deployable to the cloud for team access. The props editor is particularly useful with Zod schemas --- you can adjust text, colors, and timing visually without touching code. This is Remotion's strongest UX advantage.
Hyperframes Preview: npx hyperframes preview opens a live preview in the browser with instant hot reload. No build step. Edit the HTML, save, see changes. Simpler than Remotion Studio but less feature-rich --- no timeline scrubbing, no props editor. The lack of a build step is the key advantage. In agent workflows, every second of iteration latency compounds. Hyperframes eliminates the webpack compilation that Remotion requires after each code change.
Remotion Render: CLI, Node.js SSR API (renderMedia()), AWS Lambda (distributed and production-tested), GitHub Actions, Google Cloud Run (alpha). The Lambda story is the clear leader in distributed rendering. For high-volume video production (thousands of personalized videos), Lambda scales horizontally. The SSR API lets you render from any Node.js process --- useful for agent pipelines that need to produce video as part of a larger workflow.
Hyperframes Render: npx hyperframes render --output output.mp4. Single-machine today. Docker support exists for containerized workflows. The stateless architecture doesn't block future distributed rendering, but as of May 2026, it hasn't shipped. This is Hyperframes' most significant gap compared to Remotion.
$ npx remotion render ProductIntro                  # Remotion: local render
$ npx remotion lambda render ProductIntro           # Remotion: distributed

$ npx hyperframes render                           # Hyperframes: local render
$ npx hyperframes render --output final.mp4        # Hyperframes: custom output
Remotion supports multiple output codecs: H.264, H.265, VP8, VP9, ProRes, AV1. Output formats include MP4, WebM, audio-only, image sequences, still images, GIF, and transparent video overlays. Hyperframes supports MP4 output and HDR via a two-pass compositing pipeline. For most use cases, MP4 covers what you need.
Common rendering issues and their fixes:
| Symptom | Cause | Fix |
|---|---|---|
| Blank frames in Remotion with GSAP | Wall-clock timing races ahead | Replace GSAP with interpolate() or spring() |
| Blurry text in Hyperframes | Missing device pixel ratio | Set data-scale attribute or render at 2x |
| Audio sync drift | Variable frame timing | Use fixed FPS; avoid dynamic duration calculations |
| Long render times locally | Single-threaded capture | Remotion: use Lambda. Hyperframes: use Docker parallelism. |
Remotion vs Hyperframes: An Honest Comparison
I've used both. Here's where each wins and loses.
| Dimension | Remotion | Hyperframes |
|---|---|---|
| Authoring format | React components (TSX) | HTML + CSS + GSAP |
| Build step | Required (webpack/bundler) | None --- index.html plays as-is |
| GSAP support | Wall-clock during render (broken) | Seekable, frame-accurate |
| Arbitrary HTML/CSS | Must rewrite as JSX | Paste and animate |
| Distributed rendering | Lambda, production-ready | Single-machine today |
| HDR output | Not documented | Supported (two-pass) |
| Visual editor | Harder (code + build step) | Native (same DOM is editable) |
| License | Source-available, custom Remotion License | Apache 2.0 (OSI-approved) |
| Commercial pricing | Free for 3 people, paid above | Free at any scale |
| GitHub stars | 47.1k | 19k |
| Maturity | 622+ releases, v4.x | 137 releases, v0.6.x |
| Agent integration | CLAUDE.md, AGENTS.md in repo | 13 skills, plugins for 4 agents |
| React ecosystem | Full reuse | No React dependency |
The licensing difference deserves attention. Remotion is source-available under a custom license. Free for teams of 3 or fewer. Above that, you need a Company License: $25/month per seat (Creator tier), $100/month minimum with per-render pricing (Automator tier), or $500+/month (Enterprise). If you're rendering thousands of personalized videos via Lambda, the Automator pricing adds up.
Hyperframes is Apache 2.0. Free at any scale. No per-seat pricing. No per-render fees. For companies producing video at volume, this is a significant cost difference.
My take: If you're already in the React ecosystem and need distributed rendering at scale, Remotion is the right choice today. The Lambda story is mature and proven. If you're building agent-first video workflows, care about GSAP accuracy, or want to avoid license fees at scale, Hyperframes is the better bet. The licensing model alone tips the decision for many teams. I started with Remotion because of the ecosystem maturity. I switched to Hyperframes for agent workflows --- the build-step removal alone saves significant iteration time.
The practical decision framework:
- Choose Remotion if: your team writes React daily, you need Lambda-scale distributed rendering, you want the mature ecosystem with 800+ pages of docs, or you're building a video editor product (Editor Starter).
- Choose Hyperframes if: your primary author is an AI agent, you use GSAP for animations, you need HDR output, you want to paste arbitrary HTML and animate it, or license fees at scale are a concern.
- Choose based on animation runtime: if your video relies heavily on GSAP, Lottie, or Three.js animations, Hyperframes' seek-based rendering produces more reliable output than Remotion's wall-clock approach.
Both tools support design token integration from your design system (Chapter 08). Whether you write var(--color-primary) in a TSX component or an HTML data-attribute div, the token flows through correctly. This means your videos share the same visual language as your web UI, your prototypes, and your slide decks.
The video export pipeline from Huashu Design (Chapter 07) sits adjacent to both tools. Huashu produces HTML animations and exports them to MP4/GIF using its own render pipeline (25fps base + 60fps interpolation). For design-focused motion --- product intros, UI walkthroughs, animated infographics --- Huashu's pipeline is simpler and faster to set up. For complex video compositions with multiple clips, audio tracks, and transitions, Remotion or Hyperframes are the right tools.
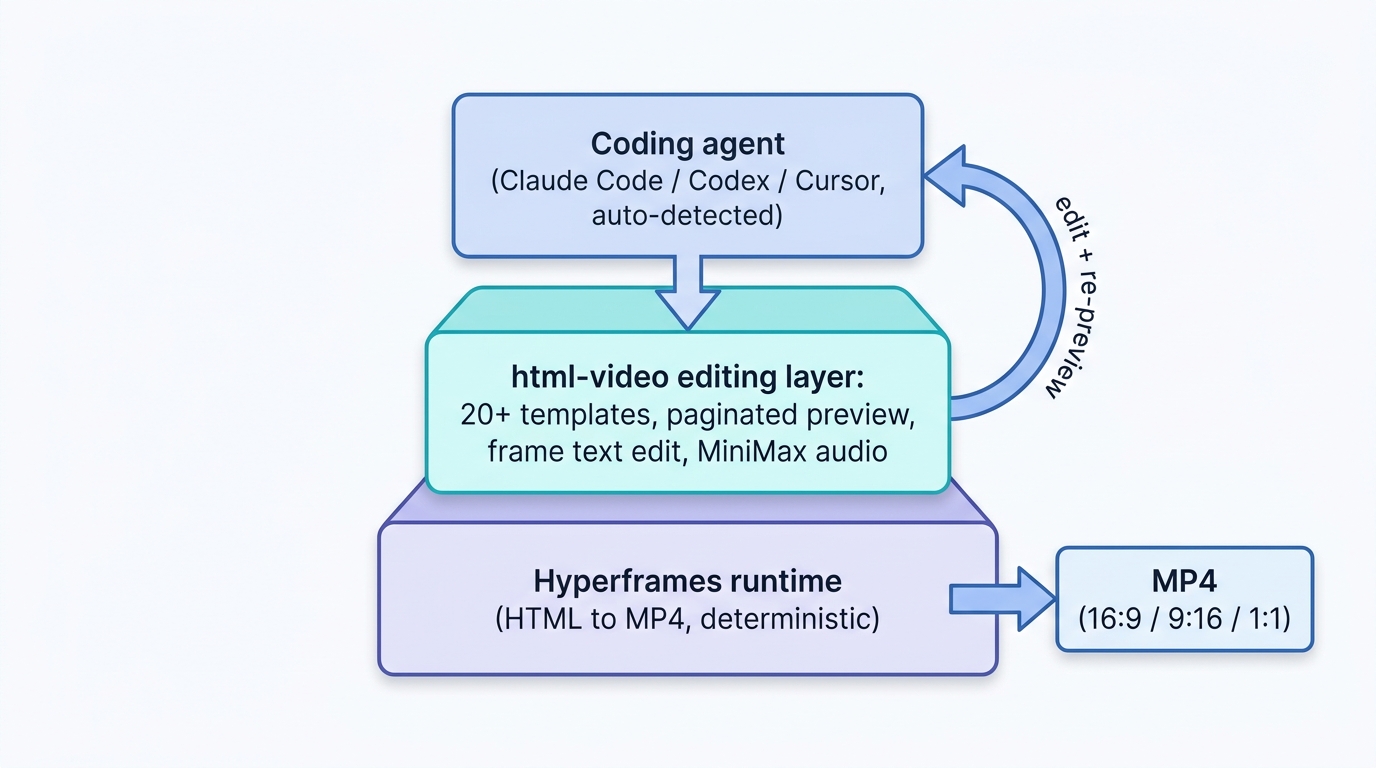
html-video: a CapCut-style editing layer on top of Hyperframes
Hyperframes is the engine an agent writes against: an HTML-native runtime that turns markup into rendered video frames. html-video is the dashboard built on top of it. It is an open-source (Apache 2.0) editing layer that sits on the Hyperframes runtime, and the pitch is blunt: a CapCut for agents that write HTML. You hand it a website link, a file, or an article, and the agent generates an MP4 from one of 20-plus style templates aimed at product promos and explainers.
What earns it a place in a video workflow is the editing model. Authoring against Hyperframes alone is render-then-look: you write markup, render the whole timeline, then watch it back to find what is wrong. html-video adds paginated preview and frame-level text editing, so you change a caption on page three and see it without re-rendering the whole timeline. That tightens the critique-revision step that pure CLI rendering leaves slow.
Two integrations matter. It auto-detects six local agent CLIs — Claude Code, Codex, Cursor, Hermes among them — and lets you switch in the top bar with no extra API keys. And it wires in MiniMax for narration and background music generated from the video's own content, so audio stops being a separate manual step.
This is a layering pattern: the framework gives the agent a deterministic, diffable target, and html-video adds the human-facing editing surface and template library on top. You do not have to choose. The agent can author against Hyperframes directly, or you can sit in html-video to scrub, edit text inline, and pick a template — the artifact underneath stays HTML either way.
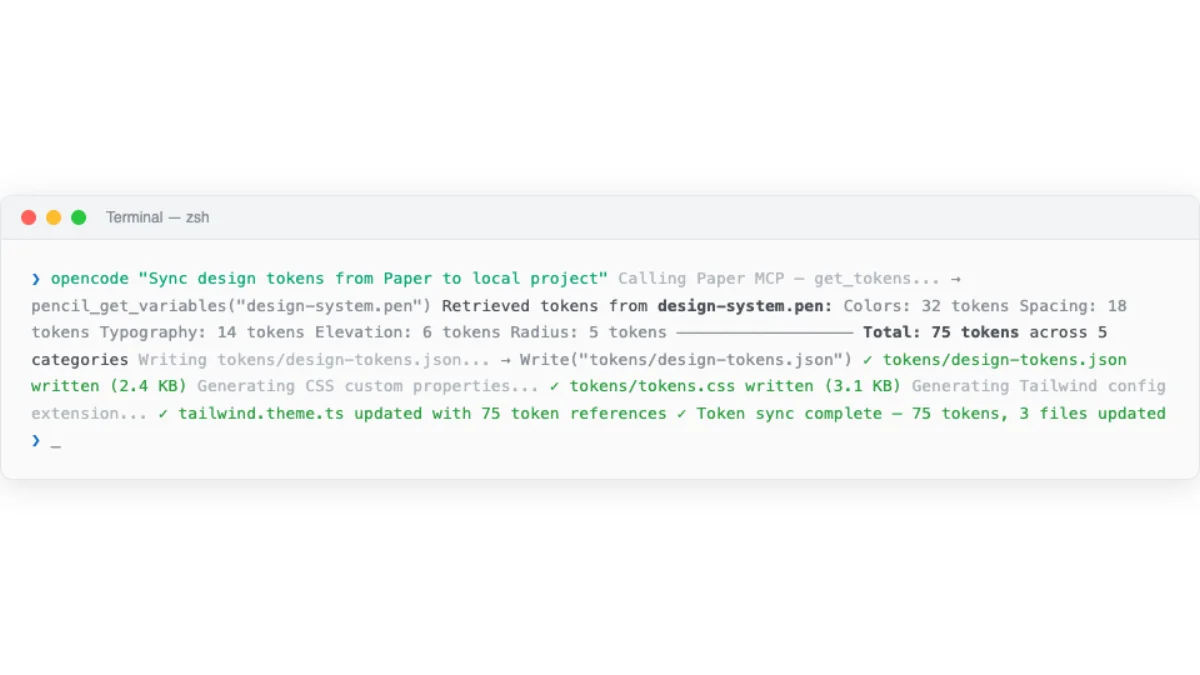
Next: All of these design tools connect to agents through MCP servers. Chapter 10 covers the Model Context Protocol in depth --- how to configure MCP servers for Figma, Paper, Pencil, OpenPencil, and other tools, and how to chain them together for multi-tool workflows.